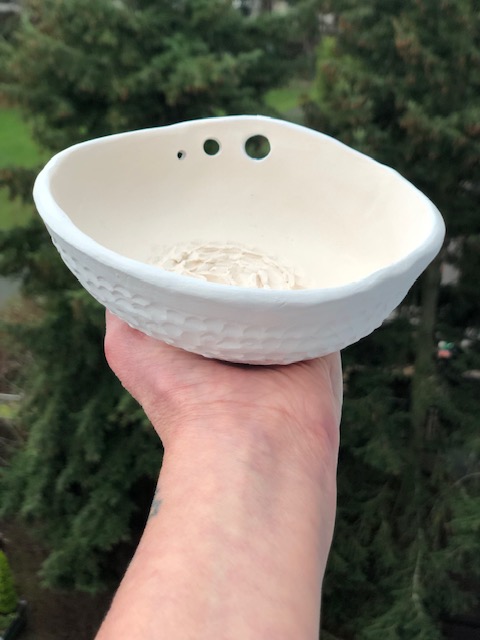
If you’re a pottery enthusiast or beginner potter looking to perfect your craft, understanding the process of bisque firing is essential. Bisque firing is a crucial first step in turning raw clay into durable ceramic pieces ready for glazing and decoration. In this guide, we’ll break down everything you need to know about bisque firing, from what it is and why it’s important, to the step-by-step process and tips for success.

What is Bisque Firing in Pottery?
Bisque firing refers to the first firing in the pottery process where raw clay pieces are heated to a high temperature to transform them from soft, malleable clay into a hard, durable, and porous ceramic body. The purpose of bisque firing is to remove moisture, organic materials, and binder elements from the clay, preparing it for glazing.
Unlike glaze firing, which happens later in the process, bisque firing is done at a lower temperature and usually does not involve any glaze or decoration. Of course, with that being said you can add colored slip or underglaze to greenware (before it’s bisque fired). The result is a light-colored, matte surface that is ideal for glazing.
Why is Bisque Firing Important?
Bisque firing plays a critical role in your pottery’s development. Here’s why it’s so important:
- Strengthens Clay: The bisque firing process strengthens your ceramic pieces, making them more durable and less fragile.
- Prepares for Glaze Application: Once fired, your pottery becomes porous, allowing glazes to adhere more effectively.
- Safe Handling: Bisque-fired pottery is sturdier and less prone to breakage compared to unfired or “greenware” pieces, making it easier to handle during the glazing process.
The Step-by-Step Bisque Firing Process
Follow these steps for a successful bisque firing:
1. Ensure Pottery is Completely Dry
Before you can fire your pottery, ensure all pieces are bone dry. This is crucial because any moisture left in the clay can cause your pottery to crack or even explode during firing. Allow your pieces to dry completely in a well-ventilated area. This can take several days, depending on the size and thickness of your pieces.
2. Load the Kiln Carefully
Once your pottery is dry, it’s time to load it into the kiln. Be sure to arrange your pieces so they don’t crowd each other, allowing for proper airflow. Overcrowding the kiln can lead to uneven firing or breakage.
>The following are general guidelines, check with your local studio or firing service<
3. Set the Kiln’s Firing Program
The bisque firing process typically involves the following stages:
- Ramp Up: The kiln slowly heats up at around 100°F–200°F (38°C–93°C) per hour. This gradual temperature increase helps prevent cracking.
- Soak: The kiln reaches a target temperature of 1800°F–1900°F (982°C–1038°C) for a prolonged period to remove all moisture and volatile elements from the clay.
- Cool Down: After reaching the desired temperature, the kiln gradually cools to room temperature. This step is essential to avoid thermal shock, which can cause cracks.
4. Unloading the Kiln
Once the kiln has cooled completely, typically 24–48 hours later, carefully unload your bisque-fired pottery. At this stage, the clay will be hard, durable, and ready for glazing.
Ideal Bisque Firing Temperatures for Different Clay Bodies
Different types of clay require different bisque firing temperatures. Here’s a quick guide to help you determine the right bisque firing range for your clay body:
- Earthenware Clay: Typically bisque fires at 1750°F–1850°F (950°C–1010°C).
- Stoneware Clay: Bisque fires at a temperature range of 1800°F–1900°F (982°C–1038°C).
- Porcelain Clay: Requires a higher bisque firing temperature, usually around 1900°F–1950°F (1038°C–1066°C).
Make sure to check the specifications for your clay to ensure you’re firing it at the correct temperature.
Tips for a Successful Bisque Firing
- Avoid Overloading the Kiln: Overloading the kiln can lead to uneven firing. Leave enough space between your pieces for airflow.
- Check for Air Pockets: Before firing, ensure there are no air pockets trapped in your pieces. These pockets can cause your pottery to crack or explode under the heat.
- Slow Heating and Cooling: Always heat and cool your kiln slowly. A rapid temperature change can cause thermal shock, leading to cracks.
- Choose the Right Clay: Use high-quality clay bodies that are designed for bisque firing, as some clays may not perform well at high temperatures.
Bisque Firing vs. Glaze Firing: What’s the Difference?
While bisque firing prepares your pottery for glazing, it’s important to distinguish it from the glaze firing, which happens later in the process. After bisque firing, your pottery is ready to be glazed, and then it undergoes another firing at a higher temperature to melt and set the glaze.
Conclusion
Bisque firing is an essential step in pottery that transforms your raw clay pieces into durable, glaze-ready ceramics. By understanding the process and paying attention to temperature and timing, you can ensure your pottery is fired properly and set up for success. Whether you’re working with earthenware, stoneware, or porcelain, the bisque firing stage will give your pieces the strength and texture needed for glazing.
As always, don’t rush the process—patience is key when it comes to pottery. By mastering bisque firing, you’ll be one step closer to creating beautiful, long-lasting ceramic works of art!
Kiln Firing Included
Every Potterings class includes both the bisque fire and glaze fire, all you need to do is make beautiful and handmade pottery. Check out the Potterings latest workshops here to see what you can make.
Happy pottering!

